Showing posts with label Coffee. Show all posts

Saturday, March 28, 2020

Whipped Coffee/ Dalgona Coffee


Today morning I got a whatsapp message from my brother, regarding this coffee. He sent me asking to make it today as it is very easy and simple and also it won't take much time. As soon as I saw the video, I realized that I have seen many videos of this recipes.a we can make frothy coffee in our house.


A very simple frothy coffee that can be made at the comfort of your house. This is called a Dalgona coffee. Mix together the coffee powder, sugar and hot water. Blend well using a blender or a frother for the milk and ta da it's ready Scoop and add in a cup of hot/ cold milk. I added the froth in hot milk and enjoyed a nice warm coffee.


Dalgona Coffee is a cold latte drink with a velvety coffee foam. It's a perfect drink for those who miss the coffee shops especially during this time.
I am seeing a lot of instagramers posting this whipped coffee recipe. This has gone viral as most of the people are trying and flooding the internet with the pictures of this coffee. As this is an easy recipe to prepare this doesn't take much time to prepare. Instead of your evening tea/ coffee you can have this one day. Hope you all try this out and let me know how it turned....


Ingredients:

  1. Instant Coffee Powder- 2 tbsp
  2. Sugar- 2 tbsp
  3. Hot Water- 2 tbsp
  4. Milk- 1 Cup

Method:

  1. In a glass bowl add the instant coffee, sugar and hot water. Blend using a electric/ hand blender for about 5- 10 minutes. You can also whisk with hand, but it will take little bit more time than the electric blender.
  2. I made stiff peaks. Pour milk in two glasses and top it with the foamy coffee mixture and enjoy sipping hot/ cold.


Monday, September 24, 2018

Chukku Kaapi/ Dry Ginger Coffee


Chukku Kaapi is also called as herbal coffee, which is a herbal medicinal decoction and a great home remedy for a sore throat, cold, cough and mild fever. This magical drink is hot, spicy, sweet, strong and very aromatic. Whenever I make this coffee, the whole house will be filled with the aroma. My mom used to make this often whenever we fell sick.


This time around when I made the herbal coffee, there was something new that I got to experiment which turns out to be the first of its kind in my blog. Here I am, introducing to you, the beautiful copper mugs sent to me all the way from Canada. Thanks a bunch to Jessica (www.moscowmuled.com) for sending these over to me. You can check their page to know more about these mugs.


I was so excited to see those mugs and it almost never crossed my mind before that we could use these copper mugs in other types of beverages other than the actual "Moscow Mule". While I am on this topic, I have to mention that there are traditional claims about the health benefits of using copper utensils. There are different schools of thought supporting this claim and otherwise.


However, a general concern about copper utensils is the possibility of copper toxicity. But the makers of this particular brand of Moscow Mule mugs have done a good job of thinking through this and these beautiful mugs are made with stainless steel lining in the inside of these mugs.

The herbal coffee which I made today was my first beverage in these copper mugs.

Ingredients:

  1. Dry Ginger Powder- 1tbsp
  2. Ginger (grated)- 1 tbsp
  3. Coffee Powder- 1 tbsp
  4. Jaggery Powder- 2 tbsp
  5. Whole Pepper- 2 tbsp
  6. Water- 2 Cups 

Method:

  1. Boil the water. Meanwhile, crush the whole peppercorns along with ginger.
  2. Add the jaggery in the boiling water. When it starts melting add the ginger powder and the crushed ginger and pepper. Let it boil.
  3. Add the coffee after a minute and switch of the flame. Inhale the steam coming from the coffee, it will enhance your senses.
  4. Sip the hot coffee slowly by enjoying the aroma.


Wednesday, January 24, 2018

Mocha Cake with Coffee Mousse topped with a shiny Mirror Glaze- A wedding anniversary delight


Yesterday was our wedding anniversary and to celebrate the occasion I baked this mirror glaze mocha cake for the first time. I was looking for a chance to bake this amazingly scrumptious cake and so I got a reason.

This is the first time I am trying the mirror glaze effect and it came out perfect. I have followed my very own mocha cake recipe, the coffee mousse recipe and mirror glaze recipe I adapted from different blogs.
I choose the coffee flavor for our anniversary cake as we all love the flavor a lot. The glaze came out perfect and so I want to share the recipe with my lovely friends. The creamy white chocolate gives a mirror-like finish when poured over a smoothly frosted cake. The latest craze in this baking is this shiny mirror like a glaze and the glazing effect. I am very happy and excited to share this recipe with all of you. Hope you will try and let me know.


Ingredients:
For Mocha Cake
  1. All Purpose Flour- 1 1/2 Cups
  2. Sugar- 1 Cup
  3. Baking Soda- 1 Tsp
  4. Cocoa Powder- 3 tbsp
  5. Oil- 1/4 Cup
  6. Brewed Coffee- 1 Cup
  7. Salt- a pinch
  8. Vanilla Essence- 1 tsp
  9. Lemon juice- 1 tbsp

Method:
  1. Preheat the oven to 350 degrees C.
  2. Mix brewed coffee, sugar, lemon juice, oil and vanilla essence in a mixing bowl.
  3. Sieve the all purpose flour, salt, baking soda and cocoa powder, keep this aside. Mix the dry ingredients along with wet ingredients till everything is well blended.
  4. Pour this into a springform baking pan and bake for about 20- 25 minutes or a skewer inserted comes out clean. Let this cool.


  1. Gelatine- 2 tbsp
  2. Water- 1/3 Cup
  3. Whipping Cream- 2 Cups
  4. Sugar- 1/3 Cup
  5. Strong Coffee- 3/4 Cup
  6. Vanilla Essence- 1 tsp

Method:
  1. In a glass bowl, sprinkle the gelatine and pour hot water. Mix until the gelatine dissolves. Let it cool.
  2. In another bowl, whip the cream till stiff peaks are formed, add the sugar, strong coffee, vanilla essence and mix well.
  3. In this add the cooled gelatine, mix and keep this aside.
  4. Take the cooled cake in the springform pan and pour the prepared coffee mousse and level it using a spatula. Keep this refrigerated for 4 hours or overnight.


  1. White Chocolate- 2 Cups
  2. Condensed Milk- 2/3 Cup
  3. Sugar- 1/4 Cup
  4. Red color Gel- 4- 5 drops
  5. water- 1/2 Cup +1/2 Cup
  6. Gelatine- 2 tbsp

Method:
  1. Heat the condensed milk, sugar and 1/2 Cup water on a low heat. In the remaining 1/2 cup water add the gelatine and mix until the gelatine gets dissolved.
  2. Add this dissolved gelatine in the above made condensed milk mixture and stir until everything gets mixed well.
  3. Pour this hot liquid in the white chocolate chips and whisk it slowly until the chocolate has melted well. Let the glaze cool.
  4. Assembling the Cake:
  5. Remove the cake from refrigerator and take out the springform by running a warm knife around the sides of the cake.
  6. Pour the cooled mirror glaze on top of the cake and let it sit for another 2- 3 hours.
  7. Half an hour before cutting the cake, take the cake out of the refrigerator and enjoy.


Sunday, February 14, 2016

Chocolate Cake Pops for Valentine’s Day


The way of celebrating valentine's day has changed a lot in modern times. Gifting greeting cards, roses, chocolates, gift cards has become the recent trend of celebrating valentine's day.


Everyone has there own way of celebrating this day and so I have made chocolate pops which are dipped in pink candy melts and decorated with Nutella hearts.


I made this for the first time and fell in love with these cuties, that can be decorated however we want. These cute little cakes on a stick are really simple and easy to make.


Ingredients:
  1. Chocolate Cake (crumbled)- 3 Cups
  2. Butter (at room temperature)- ¾ Cup
  3. Cocoa Powder- 4 tbsp
  4. Coffee Powder- 1 tbsp
  5. Granulated Sugar- ½ Cup
  6. Candy Melts- ½ Cup
Method:

  1. Cream the butter till it forms fluffy, light and cream in colour. In this add cocoa powder, coffee powder and sugar. Mix well.
  2. Add this in the crumbled cake mixture and mix properly with hand and make round balls of desired size. Insert cake pop sticks in each of the cake balls.
  3. Keep this refrigerated for about 1- 2 hours, so that it will be firm when dipped in the candy melts.
  4. Take the candy melts in a microwave safe bowl and let it melt fully. In between stir well so that it won't get burnt.
  5. When the melted candy melts are cooled, dip each of the cake pops and give it a round and take it and let it rest on a thermocol base, till it becomes hard. I have dipped only half as I want it that way.   
  6. Decorate it with nutella hearts or with sprinkles or with drizzling melted chocolate or as desired.  


Thursday, January 23, 2014

Vanilla and Coffee layered Cake with Coffee Cream Frosting and Chocolate Decorations

I was in deep thought from so many days as what to bake for our wedding anniversary and this is what I finalised at last after googling through some of the amazing cakes from the site “Passionate about Baking”. You all might know that this blog has many lip smacking cakes and the food pics are really a feast to the eyes. I choose this cake dish as all the ingredients were available easily.


I have modified the original recipe a bit. I just made the vanilla cake the way it was in the original recipe. For the coffee cake I used my own version which I had posted earlier in my blog. I assembled the two cakes alternatively along with coffee syrup and coffee cream frosting. Finally, I decorated the cake with chocolate decorations and jelly which I had prepared for my little one.


You will love this cake if you are a fan of coffee flavor.


Adapted From Passionate about Baking:
Ingredients:
Vanilla Sponge Cake:
  1. Flour- 75 gms
  2. Baking powder- 1 tsp
  3. Eggs- 3 nos
  4. Sugar- 75 gms
  5. Milk- 2 tbsp
  6. Olive oil- 2 tbsp
  7. Vanilla extract- 1 tsp
Method:
  • Pre heat the oven to 180 degrees C.
  • Sieve the flour and baking powder. Keep it aside.
  • Beat the eggs, sugar and vanilla extract well over a big bowl of simmering water, till it doubles the quantity for about 5- 7 minutes.
  • Add the flour mixture in the above mixture and alternately with oil and milk. Fold well.
  • Pour this in a greased cake pan and bake for about 30 minutes or till a skewer inserted comes out clean.
  • After the cake cools down, cut it in two slices.
For Coffee Cake layer:
  • You can follow my Coffee Cake recipe.
  • After the coffee cake completely cools down, slice the cake into 2 layers.
For the Coffee Syrup:
  • Hot Water- ½ Cup
  • Sugar- 2 tbsp
  • Coffee Powder- 2 tbsp
Method:
  • Mix all the ingredients required for the syrup and let it cool.
For the Coffee Whipped Cream:
  • Whipping Cream- 1 Cup
  • Sugar- as required
  • Coffee Powder- 2 tbsp
Method:
  • Whip the cream, sugar and coffee powder well to form stiff peaks.
Assembling the cake:

  • Place a layer of coffee cake on a card board base or a cake plate.
  • Sprinkle lightly coffee syrup on the coffee cake and spread a portion of coffee cream uniformly to the sides.
  • Over this place a layer of vanilla sponge cake and repeat the process of syrup and cream.
  • Finish of with the remaining layers and spread the coffee cream evenly onto the side using a spatula.
  • Garnish the cake using chocolate decorations and jelly as you want. Chill the cake until ready to serve.


Monday, November 11, 2013

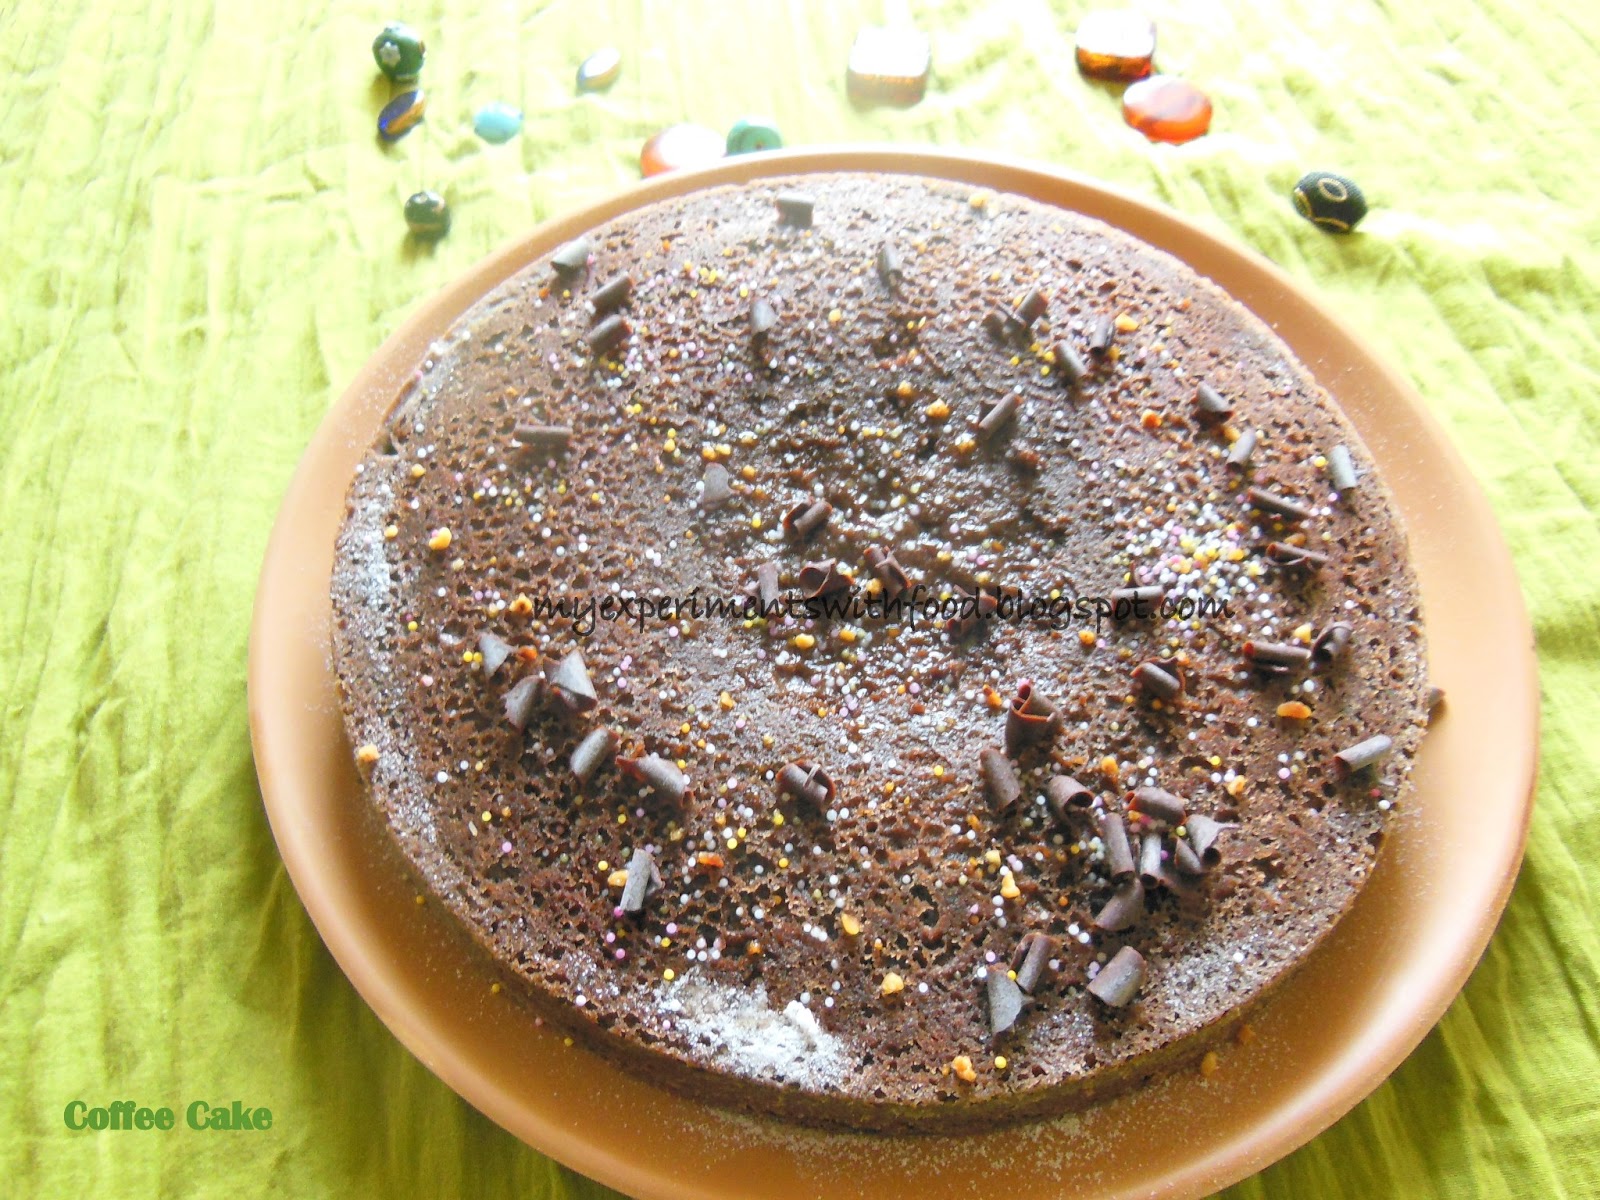
Coffee Cake with grated chocolate topping

Celebrating the 3rd anniversary of my dear little space ...

Time flies by so quickly and I didn’t realise that its been 3 years since I started my blog. In these years I have learnt a lot about blogging, about different cuisines, found lot of friends and  more than that improved skills in baking and have become a crazy baker… :)


I am really thankful to my husband for supporting me with this blog. He encouraged me to write up the content and to upload food pics of whatever I made and the most important thing is that whatever I made it was experimented on him first. In fact, he wanted to name this blog “My experiments with husband” instead of “My experiments with food”... :)


So to celebrate the 3rd anniversary of my blog, I baked a coffee cake which is one of my favorites. I love the coffee flavor blended with the cake. When the cake was being baked the aroma of the cake along with coffee, filled the house and couldn’t resist tasting a bit while it was cooling down. I just topped the cake with grated white chocolate as we didn’t like the butter cream frosting. This is a simple and easy cake to bake for a party or any occasion.


Ingredients:
  1. Maida- 100 gms
  2. Baking powder
  3. Butter- 100 gms
  4. Eggs- 2 nos
  5. Sugar- 100gms
  6. Coffee- 2 tbsp
  7. Hot water- 2 tbsp
Method:

  1. Dissolve coffee in hot water. Mix and keep this aside.
  2. Cream the butter and sugar well, till it turns light and  fluffy. Add the eggs and beat well. Add the maida gradually and mix till all are well blended.
  3. In the above mixture add the coffee water and mix well.
  4. Preheat the oven to 180 degrees C. Pour the cake batter in a greased cake pan and bake for about 25- 30 minutes.
  5. Grate white chocolate and top it on warm coffee cake and serve.


Thursday, January 31, 2013

Soft and moist Coffee Cake

This is the cake which I made last week for my wedding anniversary. As I was little busy with the visit of my in- laws and going here and there, I couldn’t post the cake recipe.

Coffee cakes are of two types, the one which can be eaten with coffee or the one which has a strong coffee flavor.


I wanted to try something different and to bake the cake which I never did before. So keeping in mind my in -laws and husband’s tastes, I ended up baking a coffee flavored cake as all of them are fond of coffee. I found this cake recipe in ria’s collections. It is named as mahogany cake. But as the coffee flavour is too much I named it Coffee Cake. This delicious coffee cake is great for all occasions.


Usually coffee cakes have a delicious crumb topping of the nuts. But as it has a rich and buttery flavor I dont want to add any more calories to this. That is why I didn’t decorate the cake with whipping cream. This cake is so soft and moist that when you sprinkle the coffee syrup it will get absorbed quickly. The brown colour of my cake is due to addition of cocoa powder. If you want you can reduce or even avoid the cocoa powder.

Ingredients:

  1. Maida / All purpose flour- 1 ⅓Cups
  2. Baking soda- ¼ tsp
  3. Boiling water- ½ cup
  4. Coffee powder- 2 tsp
  5. Cocoa powder- 2 tbsp
  6. Sugar- ¾ cup
  7. Eggs- 2 nos
  8. Salt- a pinch
  9. Vinegar- ½ tsp
  10. Vanilla extract- 1tsp
  11. Butter- 150 gms
Soaking Syrup:
  1. Coffee powder- 2tsp
  2. Boiled water- ¼ cup
  3. Sugar- 1 tbsp
Method:
  1. Preheat the oven to 180 degrees C.
  2. Dissolve coffee in boiled water. Add cocoa powder and mix and keep it aside.
  3. Cream the butter and sugar till creamy and in this add the eggs and beat well till fluffy.
  4. Add vinegar and vanilla extract. Add the flour, baking soda and salt alternately along with coffee- cocoa mixture.
  5. After mixing pour this batter in the prepared greased tin and bake for about 30- 40 minutes or a toothpick inserted comes out clean.
For the soaking syrup
  • Mix the sugar and coffee powder in the boiled water and keep it aside to cool.
  • After the cake is baked pour the coffee syrup (just about 3- 4 tbsps) on the warm cake little by little.
  • Decorate as you wish and cut this soft and moist cake into slices.


Related Posts Plugin for WordPress, Blogger...