Showing posts with label Bake. Show all posts

Monday, December 20, 2021

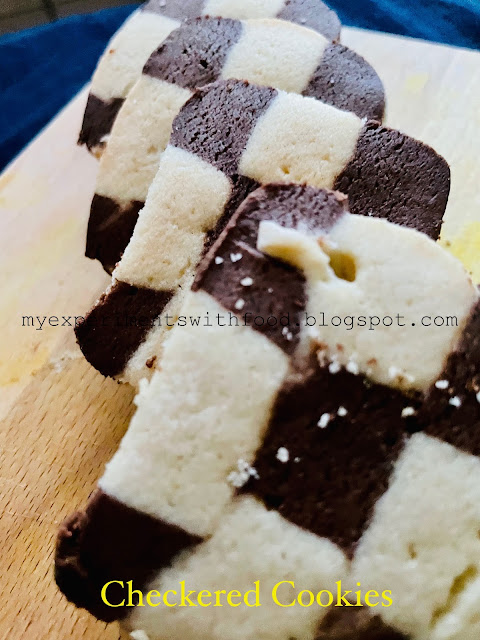
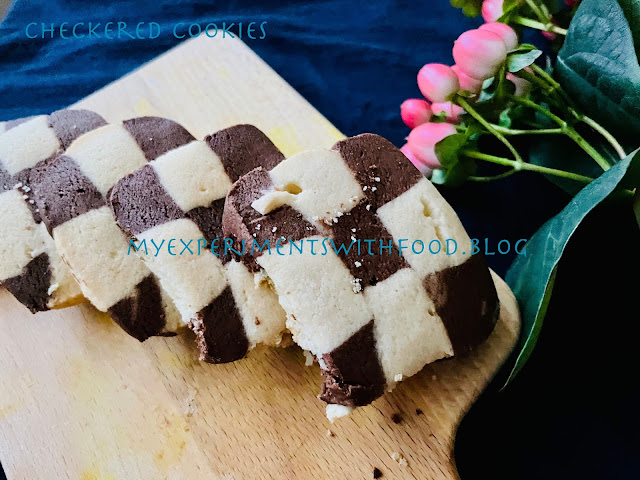
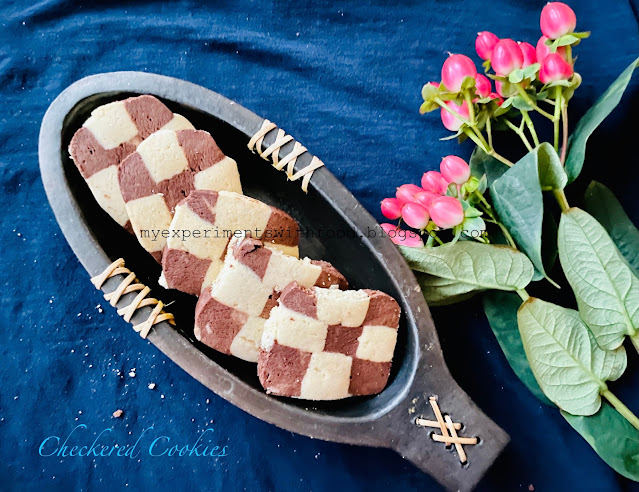
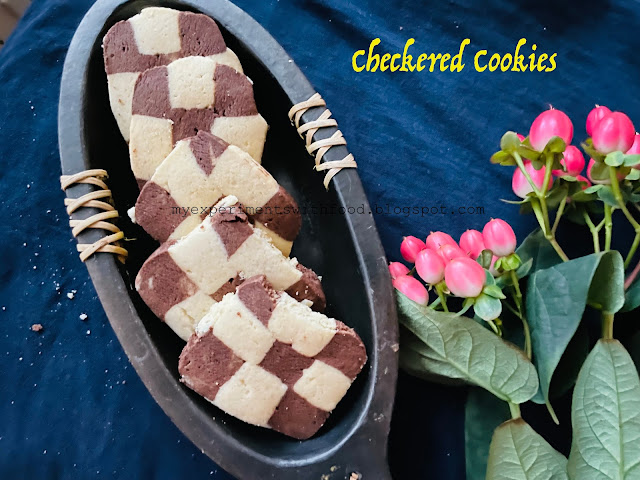
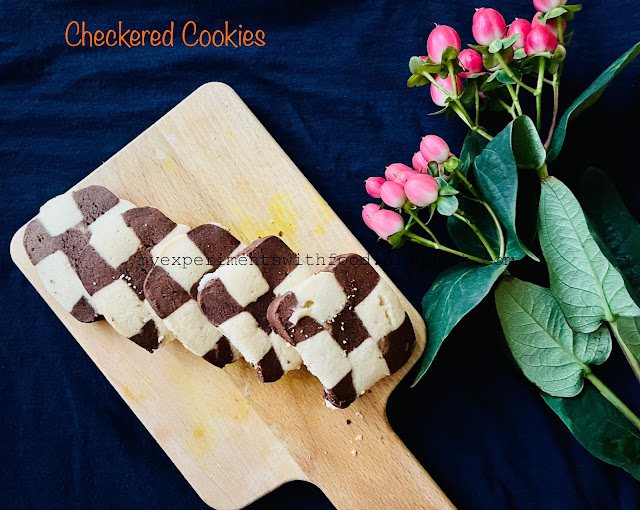
Checkered Cookies- A Christmas Treat!!!!


My friends came over for a Christmas party and we had a potluck lunch, then we made ugly sweaters together and did white elephant by stealing and keeping the gifts. It was so much fun with them. While they were leaving I wanted to give them some christmasy gifts and cookies, so I wrapped snow globes and I was googling for cookies. I wanted to make some cookies which I never posted in my blog and so I made these checkered cookies which is very different from the normal cookies and which will be liked by all because of the cakey texture of the cookies.

I got the recipe from here and I double the ingredients as I have to make a big batch to give to my friends and save some for my kids. These cookies look tedious to make but it can be done within no time if you make these with your friends or family. My kids were helping me in making these and it was so much fun. These cookies are buttery, festive, delicious and a simple one with a choice of chocolate or vanilla. Try this out and let me know.

Ingredients:

  1. Butter- 2 Cups
  2. Sugar- 1 1/2 Cups
  3. Eggs- 2 
  4. Vanilla Essence- 2 tsp
  5. Baking powder- 2 tsp
  6. All purpose Flour- 4.5 Cups
  7. Cocoa powder- 1/3 Cups

Method:

  1. Cream the butter along with sugar and add the eggs one by one and mix well. 
  2. When they are combined add the vanilla essence, mix then add all purpose flour and baking powder in small quantities and mixing in between. 
  3. When everything gets combined well, divide the dough in half and in one half add the cocoa powder and give it a nice mix.
  4. Form each dough in a square log and wrap both the dough in cling film and place it in refrigerator for 30 minutes. Make sure both the cookie dough should be of the same shape and length.
  5. After 30 minutes, take it out of the refrigerator, using sharp knife slice the dough into thirds longwise, turn it ones and cut into thirds again. We will get 9 strips.
  6. Repeat the process with the other dough. Whole together we will have 18 strips of dough.
  7. Place one stripe of vanilla dough, chocolate and then vanilla on a flat surface. On top alternating with the strips and then on top repeat the same process till we get a square log. Press this dough together tightly, keeping the square shape.
  8. Meanwhile place a parchment paper on a baking tray and preheat the oven to 350 degrees F.
  9. Refrigerate again for 15 minutes. Take it out and slice into 1/4th inch pieces. You can see nice checkered pattern. 
  10. Place them on a parchment paper and bake for 12- 15 minutes. Cool on a wire rack and enjoy!!!


Tuesday, July 6, 2021

Thumb Print Cookies- An Ultimate Indulgence!!!


B
uttery short bread cookies filled with jam is a a perfect dessert for any occasion. It's a hit among friends and family. These are perfect holiday treats which can be gifted to friends.

I baked these cookies along with my kids and my 6 yr old was very excited to fill the cookies with jam. As most of my friends know that, we have moved to our own space, to meet and greet our neighbors,  I baked these cookies.

These cookies are so easy to make and just needs a handful of ingredients which is easily available in your pantry. These cookies can be baked within 30 minutes and because of jam, this becomes a super hit among kids. I filled these cookies with strawberry and blueberry jam, you can use any jam of your choice and it won't go wrong.


Make sure that while shaping the balls, it should be smooth and firm, or else the cookie dough can crack (like mine). Some recipes call for adding the jam after baking the cookies, but adding the jam pre baked will be nice and warm and bakes into the dough. Hope you all will try this recipe and if so, let me know. So, lets get started..


Ingredients:

  1. All Purpose Flour- 2 Cups
  2. Corn Flour- 1/r4 Cup
  3. Salt- a Pinch
  4. Butter- 1/2 Cup
  5. Eggs- 2 
  6. Vanilla Essence- 1tsp

Method:

  1. Sieve the all purpose flour, corn flour and salt. Keep it aside.
  2. Meanwhile beat the softened butter and sugar. Add the eggs and beat till creamy.
  3. Add the above mixed flour mixture into batches and mix till it forms a smooth dough.
  4. If it feels sticky just keep this dough in the refrigerator for 10 minutes, mine was perfect so started to shape them into balls and place them on a tray lined with parchment paper.
  5. Use your thumb to make an indentation into each ball of cookie dough. Spoon 1/2 tsp of jam on each of the indentation.
  6. Bake for about 10- 12 minutes or when the bottom turns light brown. Remove and cool completely and enjoy the jam filled cookies.


Wednesday, January 27, 2021

Opera Cake- A scrumptious French Dessert


I made an Opera Cake!!!! I was thinking of making this cake from many months and I thought our anniversary is a perfect occasion to bake this cake. This cake surprisingly came out perfect though this was a little time consuming. The delicious taste of coffee and chocolate make this opera cake recipe well worth the time investment. 

This cake has different layers of almond Joconde with buttercream and chocolate ganache which is topped with chocolate glaze. The effort you put into this showstopper is well worth the result. Authentic opera cake has opera piped on top of the cake but as this was our anniversary, I left it plain. This cake is a super hit among my family and friends and can be made in any occasion. This cake would be liked and loved by all. Here is the recipe, try this out and please let me know.


Ingredients:

For the Almond Cake:

  1. Eggs White- 4
  2. Sugar- 2 tbsp
  3. Almond Flour- 2 cups
  4. All Purpose Flour- 1/2 Cup
  5. Sugar- 2 Cups
  6. Whole Eggs- 3
  7. Butter- 3 tbsp

Method for Almond Cake:

  1. Preheat the oven to 350 degrees F.
  2. Beat the egg whites slightly and add the 2 tbsp sugar. Beat till they form creamy and holds stiff peaks.
  3. In another bowl, beat the almond flour along with the whole eggs and confectioners sugar till they become creamy.
  4. Add this into the above made egg mixture, gently fold and add the melted butter at last. Mix and pour this in a greased square baking pan and bake till done, for about 30 minutes or a skewer inserted comes out clean.

Coffee Syrup:

  1. Instant Coffee Powder- 4 tbsp
  2. Sugar- 3 tbsp
  3. Water- 1/4 Cup

Method:

  • Add the coffee to the boiling water and add sugar. Mix well to incorporate. Keep this aside.

Coffee Buttercream Frosting:

Ingredients:

  1. Confectioners Sugar- 1 1/2 Cup
  2. Butter- 2 sticks (1 cup)

Method:

  • Beat the butter and sugar with a tbsp of coffee syrup. Beat till smooth, fluffy and well incorporated. Add little cream or milk if the buttercream is thick.

Chocolate Ganache:

  1. Chocolate- 1 Cup
  2. Cream- 1 Cup

  • Heat the cream and pour this onto the chocolate chips. Keep this for 5 minutes and stir well to form ganache. Keep this refrigerated until lightly set.

Method for assembling the cake:

  1. Cut the cake horizontally into 3 thin layers of cake using a floss thread.
  2. Separate the layers. place the bottom layer on a cake board, soak the coffee syrup all over the cake using a brush, so that the cake layer absorbs the syrup well.
  3. Spread the buttercream on top of the layer using a spatula, Place the second layer on top of the buttercream and soak it with coffee syrup, spread the chocolate ganache in a smooth layer.
  4. Place the last layer of cake over the chocolate ganache, soak this layer with the remaining coffee syrup, spread a thin layer of  buttercream frosting properly . Even if it drips to the sides no need to worry.
  5. Chill the cake till you make the chocolate glaze.
  6. For Chocolate Glaze, melt 1/4 cup of butter and pour this into the remaining chocolate ganache. Mix well.
  7. Take the cake out of the refrigerator and pour the chocolate glaze on top of the cake. Spread evenly and refrigerate again for 30 minutes.
  8. After 30 minutes, take the cake out of the refrigerator, cut the side using a warm knife and enjoy a rich and delicious opera cake.


Monday, December 21, 2020

Stained Glass Cookies- Holiday treats


These sugar cookies are buttery, crisp with a candy center. This tastes as good as it looks. A perfect holiday classic. This is the first time I am trying to make these cookies. Actually my daughter made these from scratch for her youtube channel as Christmas cookies. She decorated the cookies using royal icing and the second time, I thought of giving it a try by making them as stained glass using Jolly Ranchers. This was a hit among family and friends.


You cut a shape from the cookie dough, transfer it on the baking sheet and cut a smaller shape and fill it up with crushed jolly ranchers. Bake them and when the sides turn light brown in color, take it out of the oven and an evenly baked striking cookies are ready to be served.


This is a perfect treat to make and gift to your friends. For making the perfect stained glass cookie is the time. I kept them exactly for 12 minutes a minute her or there it would end up over cooked or under cooked. These cookies make beautiful Christmas tree ornament by just hanging them using a ribbon. My kids enjoyed making these and they also enjoyed eating them.

I have only seen these cookies in magazines and other blogs but now these cookies are here in my blog which I never thought I could make. If I can make these, so can you. Try this out and let me know how this turned out.


Ingredients:

  1. All Purpose Flour- 3 Cups
  2. Baking Powder- 1 tsp
  3. Butter- 1 Cup
  4. Sugar- 1 1/2 Cup
  5. Egg- 1no
  6. Vanilla essence- 1 tsp

For Stained Glass Effect:

  • Jolly Ranchers- few

Method:

  1. Preheat the oven to 350 degrees F. Place a baking paper on the tray and keep this aside.
  2. Cream the butter and sugar till they blend well. Then add the egg and vanilla essence and beat well.
  3. Mix the baking powder to the all purpose flour and add this little by little in the wet mixture and beat slowly.
  4. When all the flour mixture is added to the butter mixture, it will form a dough. Roll these using a rolling pin and using a cookie cutter shape cut into desired shapes. Cut a smaller portion in the center and arrange them in the baking tray.
  5. Keep this tray in the refrigerator for 15- 20 minutes, then crush different colored jolly ranchers in a zip lock bag and add this in the middle of the cookie and bake for about 12 minutes.
  6. Enjoy the stained glass cookie.

Stained Glass Cookie Ornament:

  • Before placing the cookies in the refrigerator, make a small hole in the top of the cookie by using a straw, then follow the next steps to bake.
  • When the cookie is baked, hang it as an ornament by tying with a rope on the Christmas tree.


Friday, November 27, 2020

Simple Apple Pie- For Thanksgiving and to celebrate 10 years of blogging!!!!!


First of all a BIGGG THANK YOU to each and everyone of you for showing so much love, support and encouragement. Thank you for everything. It's been 10 years since i started blogging. I couldn't believe that the blog space which I started on a Tuesday morning would finish 10 years, which wouldn't be possible without any of you. And also a best way of celebrating my blog's birthday is on a thanksgiving and making an apple pie!!!!!

Apple pie is a dish which I never tried before. I wanted to make this but thinking about the work involving making the filling, then the crust was a big job for me. But once I started making the pie, it was done very quickly. Now I have the confidence of making pecan pie, pumpkin pie and many other pies.

This is the recipe which I made for our thanksgiving dinner along with our friends. This is the first time we are doing the thanksgiving dinner, me and my friend shared the work of making the dishes. My friend made the turkey and boiled veggies whereas I made the mashed potatoes, boiled corn and apple pie. I was little hesitant to make the apple pie, but surprisingly it came out well.

In this recipe I cooked the apple filling, there are some recipes in which it is not required. We can just keep the filling mixed for an hour and it will release the juices. Just add this on the crust and bake.

This recipe has become a favorite and am going to bake this again tomorrow. The crust can be made in advance and can be refrigerated, the same with the filling. Hope you all will try this and if you do please let me know.


Ingredients:

For the Crust:

  1. All Purpose flour- 2 3/4 Cups
  2. Salt- a pinch
  3. Butter- 1 Cup
  4. Cold Water- 3 Tbsp

For the Filling:

  1. Apple (peeled, cored and sliced)- 4Cups
  2. Sugar- 1/4 Cup
  3. Cinnamon Powder- 1 tsp
  4. Nutmeg powder- 1 tsp
  5. Butter- 1tbsp

For Egg wash:

  • Egg- 1
  • Milk- 2 tbsp

Method for egg wash: Mix the egg and milk and keep it ready.

Method:

For the crust:

  1. Place the all purpose flour and cubed butter in the food processor and  Pulse for a couple of seconds. 
  2. Then slowly add the cold water and pulse until the dough barely begins to hold. The dough will be ready when you pinch the crumbly dough together with your fingers. Be cautious with the amount of water you add, too much of water and the dough will be tough.
  3. Empty the crumbly mixture on a clean and dry surface. Use your hands and knead until it forms a dough ball. Wrap it in cling film and store it in the refrigerator till the filling is done.

For the filling:

  1. Add the apple slices, sugar, cinnamon powder, nutmeg powder in a pan and mix well. Place it on a stove with medium flame. Stir well and mix till all the water gets absorbed. At last add the butter and mix well and keep this aside.
  2. Take the pie crust from the fridge and let it rest for 10 minutes to soften the dough.
  3. Roll the dough using rolling pin on a slightly floured surface. while rolling make sure that the dough is not sticking to the surface, add some flour if necessary.
  4. Place this carefully in a greased baking pan and cut around the excess of the dough using a kitchen scissors. Place the apple filling and spread evenly now for the pie to cover roll out the excess dough and cut into long strips and lattice the top. Trim the edges and brush the top using egg wash. 
  5. Bake the apple pie for about an hour and the top should be lightly brown in color. If the top is browning too quickly, cover the top using an aluminum foil. this will slow the browning.
  6. When the pie is done, let it cool and cut into slices and enjoy along with ice cream.


Sunday, September 20, 2020

Arabian Chicken Mandi


A traditional mandi is authentically cooked in an underground oven called Taboon. Coal is used to cook the meat hence the smokey flavor. My version is an easy and a simple way to make at home which is healthy as well as tasty. 

I googled around many recipes of chicken mandi and made this dish which surprisingly turned out the perfect one that we had when we were in India last time. I have marinated the whole chicken for overnight, if you plan well before you can do that or else it can be marinated for 2- 3 hours. I wanted the perfect mandi flavor so I marinated overnight. 


The rice is prepared by adding all the whole spices and the dried lemons which gives a flavor to the rice. Then this rice is transferred into the oven and the whole chicken is placed on top rack so that the water from the chicken directly falls into the rice by this the flavor of the meat lingers on in the rice.

As Kerala has wholeheartedly welcomed yummiest of dishes from across the seas, one such dish is "mandi". In Kerala, which ever restaurant you go this dish is available that too they prepare in the traditional way of digging a hole in the ground and filling it up with coal. 


At first I thought it is a long process of preparation but once i started the step by step everything came of quickly.The perfect combination along with this rice is "dakkous" a mixture of tomatoes, green chilies, onions. 

I will be posting some step by step pictures which I managed to capture while making this dish. Hope you all might really enjoy and try this dish.

Ingredients:

  • Whole Chicken- Cleaned and washed

Mandi Spice Mix:

  1. Cumin Seeds- 1 tbsp
  2. Coriander Seeds- 1 tbsp
  3. Cardamom- 3 nos
  4. Cloves- 5 
  5. Cinnamon Stick- 1"
  6. Black Pepper powder- 1 tsp
  7. Lemon Juice- 2tbsp
  8. Turmeric Powder- 1 tsp
  9. Olive Oil- 1 tbsp

Basmati Rice Mix:

  1. Basmati Rice- 3 Cups
  2. Water- 5 Cups
  3. Dried Lemons- 2
  4. Whole Spices (cardamom, cloves, cinnamon, star anise)- 1tbsp
  5. Salt- as required

Method:

  • Preheat the oven 350 degrees F.

For the spice mix. Heat a pan and roast the cumin seeds, coriander seeds. When cooled transfer to a dry grinder along with cardamom, cloves, cinnamon, black pepper powder and turmeric powder into a fine powder. Rub this mix along with salt, olive oil and lemon juice onto the chicken well and marinate for about 1 hour/ overnight. ( I marinated the chicken overnight as I had some time).


For the rice: Heat a pot, add oil, whole spices, mandi spice mix, dried lemon and add the rice, fry for a minute. Add water and let it boil by putting a lid. Once it starts boiling, switch off the flame and move the pot of rice into the preheated oven.


  • Place the rice on the bottom rack and place the marinated chicken on top rack just above the rice so that when it gets baked the water from the chicken falls into the rice. 


  • Bake this for 10 minutes and reduce the heat to 200 degrees F and bake for about 1 and half hour. After the time, switch off the oven and open the door for about 5- 10 minutes so that the chicken retains its flavor and juices. Once done, keep the rice outside along with the baked chicken on top of the rice. Enjoy the delicious dish.


Doukkous:

Ingredients:

  1. Tomatoes- 2 
  2. Onions- 1 
  3. Green Chilies- 3 
  4. Garlic Cloves- 3
  5. Salt- as required
  6. Olive oil- 1 tbsp

Method:

  • Grind all the ingredients and transfer to a bowl. Enjoy with chicken mandi.


Monday, June 22, 2020

Baked Qatayef!!!


Qatayef is a middle eastern dessert. These are yeasted pancakes stuffed with nuts or cheese filling then doused in a thick sugar syrup. They can be soft or crunchy, open or closed, sweet or savory a snack with lots and lots of options. The center can be filled not only with cheese or nuts but also with nutella. This qatayefs are ridiculously crunchy,  bursting with sticky, syrupy sweetness with every bite.


 I tasted these delicacies from a friend who is from Palestine. During Ramadan, she gave some of these uncooked qatayefs for iftar along with a bowl of sugar syrup and told me the method of either deep frying or baking then to dip them in sugar syrup and enjoy for iftar. I baked some and some I deep fried for the kids. They were so crispy and crunchy. We liked it a lot. My kids were finishing them quickly, It was so delicious. My friend told me that this is made during Ramadan times and this is one of the delicious desserts which will be loved by all and so it is.. Please try this out and let me know.


Ingredients:
For the Sugar Syrup:

  1. Sugar- 1 cups
  2. water 1 cup
  3. Lemon juice- 1 tbsp
Method:

  1. In a medium pan combine together the sugar, water and squeeze of lemon juice. Set it on high heat.
  2. Bring to a rolling boil and reduce the flame to medium. Let it simmer for 10 minutes. The syrup will thicken slightly.
  3. Switch off the flame and keep this aside to cool.

For the Pancakes:

  1. All Purpose Flour- 2 Cups
  2. Sugar- 1 tbsp
  3. Milk- 2 tbsp
  4. Baking soda- 1tsp
  5. Yeast- 1 tbsp
  6. Water- 3 Cups

Method:

  1. Mix all the ingredients for the pancake using a hand mixer till everything gets mixed well and forms a loose, pourable batter.
  2. Leave the batter for 10- 20 minutes to bubble up.
  3. Heat a non stick griddle, using a small ladle or an ice cream scoop drop about 2 tbsp of the batter over the skillet. the pancake should be about 3 inches in diameter.
  4. Allow to cook the pancakes slowly without flipping (you can see many bubbles forming) and when they are cooked keep it aside and continue with the remaining batter till all the batter gets over and keep the pancakes separate without sticking to each other and cover them with a damp towel while making the rest of the pancakes. Let them cool completely before filling.

For the Filling:

  1. Ricotta Cheese- 1 Cup
  2. Granulated Sugar- 2 tbsp
  3. Coarse ground Pistachios- 1/2 Cup

Method:

  • Mix all the ingredients for the filling in a bowl and keep it aside.

For assembling:

  1. Take the pancakes with the bubbly side up fill with the cheese and nut filling and close the pancake into half without tearing. Squeeze and pinch the outer edge tightly using your fingers to seal.
  2. You can either freeze them for about a month for later use or heat a skillet with oil and deep fry them to golden brown and crisp.
  3. Here I have deep fried half of them in oil and the other half I baked till done.
  4. Dip these hot fried/ baked qatayef into the prepared sugar syrup and enjoy a crispy crunchy snack.


Related Posts Plugin for WordPress, Blogger...