Monday, November 28, 2016

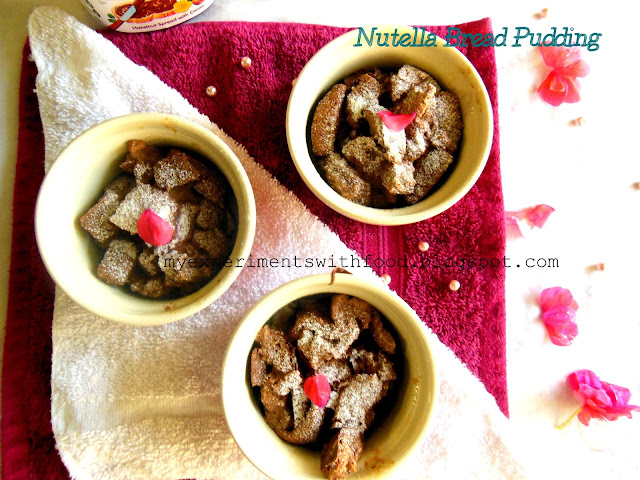
Nutella Bread Pudding


I think almost all who like chocolate are definitely going to like this pudding filled with chocolate. A perfect dessert which can be served in parties and to the guests, who arrive unexpectedly.
Previously I have posted bread and butter pudding on my blog. This dish is much easier than that. Just mix all the ingredients and bake.


I got the recipe when I was watching “Giada at home” on Netflix along with my daughter who is a big chocolate fan. From then on she was asking me to prepare this pudding and so I tried. This is a perfect dish where leftover bread can be converted to a dessert within no time.


If you want you can also add chocolate chips or some nuts. Kids will enjoy this dessert as there is a surprise waiting for them, as they scoop to the bottom of the bowl. This is a bowl filled with delicious, nutritious and flavor Lucious pudding which will be loved by all.
Ingredients:
  1. Nutella- ½ cup
  2. Milk- ¾ Cup
  3. Egg whites-4 nos
  4. Bread slices- 7- 8
Method:

  1. Preheat the oven to 350 degrees F.
  2. Separate the egg yolks and the whites. Keep the yolks for another purpose and beat the whites till fluffy and peaks are formed.
  3. In a mixing bowl, add the ½ Cup Nutella along with milk. Mix till everything gets incorporated well.
  4. In this add the fluffy, airy whipped egg whites little at a time and mix well to blend.
  5. Roughly chop the bread and drop them in the above-made Nutella egg white mixture and mix using a spatula so that all the bread pieces gets coated well.
  6. Place the greased ramekin bowl on a baking tray and put a tbsp of Nutella inside all the ramekin bowls and fill them with the bread mixture.
  7. Bake these for about 20- 25 minutes and when it is cool, sprinkle some powdered sugar, scoop out and enjoy.


Saturday, November 19, 2016

Andhra Mango Pickle/ Avakaya


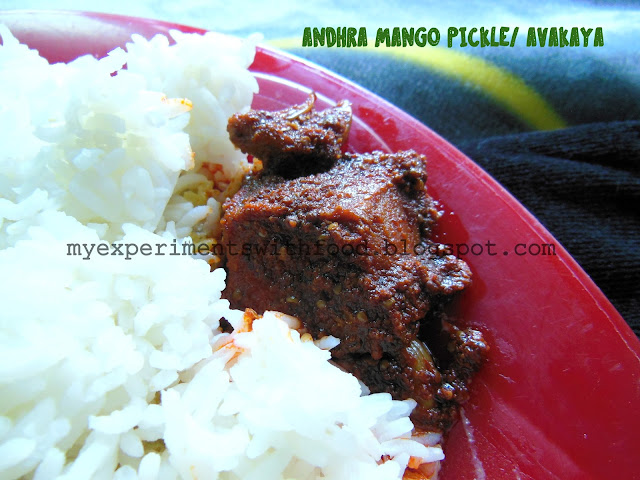
Avakaya/ Mango pickle is an authentic pickle exclusively prepared in Andhra. Those who grew up in Andhra will know the specialty of this pickle. I love this a lot. My mom mixes steaming hot rice along with dal, a dollop of ghee and this pickle and the taste was mind blowing, which I won’t forget in my life. A magical combination they are.
In almost all the houses in Andhra, they used to make this pickle at home. My friends always used to bring lunch which was pickle  mixed rice i.e “avakaya annam”.


My mom used to prepare almost all the Kerala pickles, but this avakaya is the one which she doesn’t know the exact proportions. “Priya” pickles are most famous pickles, and they used to have the “mango avakaya”, which my dad used to bring regularly. Our favorite past time in the afternoons, when my mom used to take a nap, is to take a mango piece from the pickle jar, wash it and enjoy it. This used to happen regularly and my mom used to wonder, how come a big jar of avakaya got over within a few days of purchase.. :) (this is a secret till now…)
I used to think that preparing this pickle is a big and tiring process until I stumbled upon the wonderful blogger Lubna’s blog


If we have the right proportions then making this pickle is not a difficult task. This pickle is made in large portions, because of its good shelf life and that too without refrigeration. During the mango season, the Andhra markets are flooded with varieties of raw and ripe mangoes. They used to sell raw cut mangoes for pickling. The mangoes used for avakaya is cut along with the inside shell, which is a difficult process.  If the shell is not intact then the piece should be discarded, as they turn soggy.


Here in the US, I got raw cut mangoes in the frozen section, but I was not sure of how they will turn out after preparing this pickle. But to my surprise, they turned out just like the store bought ones. Just thaw them till done and wipe with a clean tissue and start the pickling process. I was excited and happy by the outcome. I am sure that you all will love this. Just try this out.
Adapted from Kitchenflavours:
Ingredients:
  1. Mango pieces- 3 cups
  2. Mustard seeds Powder- ½ Cup
  3. Fenugreek powder- 1 tbsp
  4. Red Chilli powder- 1 Cup
  5. Salt- as required
  6. Oil- 2 Cups
  7. Garlic Cloves- 2 Cups
Method:

  1. Take mango pieces in a bowl, add the mustard seeds powder, fenugreek powder, red chili powder, garlic cloves, and oil.
  2. Mix well along with salt. Combine everything and keep this in an airtight glass jar.
  3. After 3 days open the jar and using a clean ladle, give it a nice stir. Keep it closed.
  4. Repeat the process for every 2- 3 days till 10- 15 days.
  5. Enjoy the mango pickle along with hot steamed rice and a dollop of ghee.


Monday, November 14, 2016

Baked Parippu Vada/ Baked Lentil Fritters


I never knew that we can bake parippu vada/ lentil fritters till my husband who is calorie conscious told me to make parippu vada but bake it instead of frying which we do usually. I was thinking of someone would have ever tried baking these fritters when he sent me a link of baked parippu vada. I was amazed and thought of giving it a  try, but was not sure about the taste, texture or the crispness which is fully loaded when we fry these in oil.


One evening, I baked them till done i.e till light golden color on top and surprisingly they turned out perfectly delicious. My husband and my little one finished off in a go. A very delicious and a healthy version of fried fritters.
Parippu vada is also called as masala vada, which is prepared using split peas, can also be prepared using a different combination of lentils. In Kerala, we can see these in almost all the tea shops. It is a must have snack for Keralites. My dad, who loves all the fried snacks, loves eating these vadas along with small bananas and a cup of hot tea. I too love them like that. Try these and am sure that you all will like them.


Ingredients:
  1. Chana dal- 1 cup
  2. Red chilies- 5- 6 nos
  3. Ginger (chopped)- 2 tbsp
  4. Curry leaves- few
  5. Salt- as required
  6. Chopped Onions- 1 no
  7. Oil- 1 tsp
Method:

  1. Preheat the oven to 350 degrees F.
  2. Soak the chana dal for about 3 hours and drain it for some time. Pat dry the drained dal using a kitchen towel and grind the dal to a coarse puree along with curry leaves, ginger and red chilies.
  3. Make sure that before grinding all the soaked dal, keep aside 3 tbsp of dal. This can be used when mixing everything.
  4. Transfer the ground dal mixture into a bowl and fold in the chopped onions, salt and the whole dal which we kept aside without grinding.
  5. Mix and shape them into flat discs and place on a greased baking tray or on a parchment paper.
  6. Brush oil on top of the discs. Bake for about 20- 25 minutes. Flip them, halfway through. When they cool down, serve them along with desired chutneys or just like that along with evening tea.


Wednesday, November 9, 2016

Chocolate Strawberry Ice cream Cake- Celebrating 6 years of tasteful journey…….


Hey Friends, I am too excited today as my little blog turns 6. It has been an awesome journey along with all my friends and well-wishers. I got to meet a lot of talented culinary experts from all over the country, many of them through facebook and a few in person as well.


This blog has been an inspiration for me to try out many innovative and incredible recipes, which otherwise I would not have even thought of. It gives me immense pleasure to share my recipes with all of you and a big thank you to all of you who like and comment on my FB page and the blog. That is what keeps me motivated to come back to this space more often and share more and more recipes with you folks. Once again, a BiiiiiiiGGGGG thank you all of you !!!!!


To celebrate this special day, I made an ice cream cake with the combination of chocolate and strawberries. I had some strawberries in my refrigerator and so I made a strawberry ice cream. Meanwhile, I made a chocolate cake which is my daughter’s favorite cake. In my previous posts, I have posted the recipes for strawberry ice cream and eggless chocolate cake. Just click on the ingredients below and you will get the recipes. I sandwiched them both and garnished with white chocolate.


I presented it in a beautiful glass cake stand (which you can see in my pics), which was gifted by my dear friend Arathi.
Ingredients:
  1. White Chocolate (melted)- ¼ Cup
Method:

  1. Cut the chocolate cake into half, Place a parchment paper inside the loaf cake pan and place a top half of the cake in the loaf pan.
  2. Scoop out the strawberry ice cream and smooth it on the cake . Place the second layer of the cake on top and cover with the parchment paper. Keep this in the freezer till set.
  3. Remove the cake from freezer, keep this out for 10 minutes.Turn it on a plate and drizzle some melted chocolate on the cake and serve.


Friday, November 4, 2016

Idiyappam/ String Hoppers and Chicken Shorba- A dynamic breakfast combo...


Appam, idiyappam, puttu, pathiri are common staple breakfasts of Kerala. As you all might know I have spent most of my life in Andhra, I was not a big fan of these dishes. When my mom prepares these items, I used to think how much time and effort is required to make these dishes.


After marriage, when I came to know that my husband loves all these dishes, there was no other choice rather learn them. He was ok with whatever I made, but I thought of preparing them at least on weekends so that he can enjoy his breakfast. And so my culinary journey began. At first, when I tried to make these it was a flop but later on with the correct measurements and all I succeeded. Now, my daughter loves these items and so on weekends for breakfast, I will end up making either one of these.  
A good side dish of these would be Kerala egg roast, vegetable stew, Kadala Curry or any non-veg dish. I have prepared chicken shorba with this idiyappam, which is a perfect combination, that I learned from my mom. As I love this chicken shorba, she used to prepare this side dish along with any one of the breakfasts. I would end up eating the chicken pieces… :)


Idiyappam, also called string hoppers,  can be made when guests are at home. For making this the main things you want to have are an idiyappam press and a steamer.Idiyappam along with this chicken shorba is a perfect combination of breakfast or a dinner dish which will be loved by all.


In this chicken shorba, the blend of the spices along with curd is well induced into the chicken, which absorbs all the flavors and gives a perfect balance of all the ingredients. Some like the shorba to be thicker and others prefer thinner. It depends on your own tastes and preferences. Just try this amazing combination and let me know.


Ingredients:
For making Idiyappam:
  1. Rice Flour- 2 Cups
  2. Salt- as Required
  3. Water- 2 Cups
  4. Grated Coconut- ¼ Cup
Method:
  1. Add salt to water and bring this to bubbling hot in a medium flame. Take rice flour in a mixing bowl and gradually add the boiling water, using a wooden spatula mix the flour.
  2. Add water until the dough comes together, till then mix using the wooden spatula. Keep this for about 5- 10 minutes, using your hands (be careful, the dough can be very hot) knead until you get a smooth and soft dough. The dough should not be too tight or too sticky.
  3. While kneading, if you feel that the dough is dry, just add enough hot water and knead. Cover the dough using a wet cloth.
  4. Grease the idli pan with oil, sprinkle 1 tbsp of  grated coconut into these idli pans and take required portion of the dough in the idiyappam press and squeeze onto the greased idli pans.
  5. Repeat with the remaining dough till it finishes. Steam for about 7- 9 minutes on medium- high heat.
  6. Transfer the cooked idiyappam in a serving plate and enjoy with a side dish.


Recipe for Chicken Shorba:
Ingredients:
  1. Chicken pieces- 500 gms
  2. Oil- 2 tbsp
  3. Cinnamon- 1 stick
  4. Cloves- 4 nos
  5. Cardamom- 3 nos
  6. Onions (chopped)- 3 nos
  7. Tomatoes (chopped)- 2nos
  8. Ginger and Garlic paste- 1 tbsp
  9. Red Chilli Powder- 2 tbsp
  10. Coriander powder- 1 tbsp
  11. Turmeric Powder- ½ tsp
  12. Cumin Powder- 1 tsp
  13. Pepper powder- 1 tsp
  14. Curd- 1 Cup
  15. Garam masala Powder- 12 tsp
  16. Water- 1 Cup
  17. Coriander leaves- few
Method:

  1. Pour oil, when hot add the chopped onions, when they turn translucent, add the ginger and garlic paste.
  2. When the raw smell disappears add the washed and drained chicken pieces, stir well till it gets blended.
  3. Add the chopped tomatoes, saute well. In this add the red chilli powder, coriander powder, turmeric powder, cumin powder, pepper powder and required amount of salt. Saute well till it oozes out water.
  4. Add curd, mix well. Add water and let this cook for some time closing with a lid.
  5. After 10 minutes on medium flame, take out the lid add garam masala powder, saute well. Switch off the flame.
  6. Garnish with chopped coriander leaves and enjoy this with hot idiyappam.


Related Posts Plugin for WordPress, Blogger...