Showing posts with label Snacks. Show all posts

Tuesday, June 14, 2022

Rice Paper Spring Rolls with Peanut Sauce

These rice paper spring rolls are also called as Vietnamese spring rolls. These taste amazing with the peanut sauce. I make these spring rolls all the time as my family loves them. Usually we can add any filling of our choice. These spring rolls are a refreshing change from the regular fried ones. They are a perfect appetizer for any occasion and will be a hit among family and friend. These are so delicious, easy to make and healthy.

These spring rolls are so easy to make that you just have to gather all the ingredients and there is no need of cooking except the shrimp that you can cook long before making these rolls. We can fry these spring rolls in oil but it wont be healthy.

I highly recommend to consume these spring rolls within several hours of making them. If they are refrigerated they will become hard and difficult to chew. Try this recipe and let me know.

Ingredients:

  1. Rice Paper- 12 numbers
  2. Shrimp- 20-25
  3. Pickled Carrots - 1 Cup
  4. Lettuce Leaves- 2 Cups
  5. Rice Noodles- 2 ounces
  6. Red Chilli Powder- 1 tbsp
  7. Turmeric Powder- 1/2 tsp
  8. salt- as required
  9. Oil- 1 tbsp

Method for marinated shrimp:

  • Mix the shrimp along with salt, red chilli powder, turmeric powder and fry in the 1 tbsp of oil till done. Remove on a kitchen towel and keep it aside.

  1. Meanwhile boil water and cook the rice noodles till al dente. Drain, rinse them under cool water and drain again.
  2. Heat water in a pan and when it becomes warm switch off the flame and place the rice paper in the warm water and let it rest for 20 sec. Wait till the rice paper is pliable but not super floppy. Carefully lay it flat on a towel.
  3. Place a few pieces of sliced carrots, lettuce, rice noodles one on top of the other and fold it tightly, now line the shrimp about 1 1/2 inches below the toip edge of the rice paper. By leaving a gap between the shrimp and the vegetables, the shrimp will look vibrant in the final roll. 
  4. Grab the lower edge of the rice paper with thumb and pointer finger, lift and roll up the spring roll. Use the other fingers to hold the filling. Fold the left and right edge and finish the rolling. It now looks like a rolled envelope.
  5. Repeat the same with the remaining.

Peanut sauce

  1. Peanut Butter- 1/2 Cup
  2. Soy sauce- 2 tbsp
  3. Vinegar- 2 tbsp
  4. Sesame oil- 1 tbsp
  5. Garlic- 2 tbsp
  6. Water- as needed

Method:

  • Mix all the ingredients except water in a small bowl till combined and if the dip is too thick add 1 tbsp of water. The sauce should be creamy and dip-able.
  • Enjoy the spring rolls with peanut sauce.


Friday, April 15, 2022

Kerala Style Kozhi Pidi/ Rice Dumplings in Chicken Gravy


As fasting is going on, watching the food related videos online makes us crave to try all the dishes. One such dish is this rice dumplings in chicken gravy. My daughter saw this on a food channel and asked me about this dish. As I grew up in Andhra, I ate mostly Andhra dishes and I just heard about this dish but never tasted it, so when she asked I thought of giving it a try and here I am today with the recipe in my blog.

This is a very delicious and delightful dish which is popular in the northern region of Kerala. This dish has carbs and proteins all packed in one making it a one pot meal.

Steamed Pidi

This Kerala delicacy consists of steamed rice dumpling that is soaked in the chicken gravy which can be relished as a dinner or a snack which will be very filling. Some people will just cook the pidi (rice dumpling) separately in coconut milk gravy and will have it along chicken curry, here I mixed both which formed as a delicious, thick dumpling gravy. My daughter tried it for the first time and loved it, hope you will also try and let me know how it turned.


Ingredients:

For Rice Dumplings:

  1. Rice Flour- 1 Cup
  2. Water- 1 Cup
  3. Salt- a pinch
  4. Coconut- 1/4 Cup
  5. Garlic- 1
  6. Cumin Seeds- 1tsp

Method:

  1. Grind the coconut, cumin seeds and garlic to a fine paste. Keep this aside.
  2. Boil water with a pinch of salt and the ground paste. Mix well.
  3. When the water starts boiling add the rice flour slowly and mix using a wooden spoon without forming lumps.
  4. Mix it well on a low flame and close with a lid. After 5-10 minutes switch off the flame. Mix ones again and let it cool.
  5. Knead it well to make a smooth dough. Oil your palms and make small balls, when done steam all the rice balls in a steamer till done. Keep this aside.


Ingredients for Chicken Gravy:

  1. Chicken- 2lb
  2. Onions- 2 
  3. Green Chillies- 3-4
  4. Ginger-Garlic Pate- 1 tbsp
  5. Tomatoes- 1
  6. Red Chili Powder- 2 tbsp
  7. Turmeric Powder- 1 tsp
  8. Coriander Powder- 1 tbsp
  9. Garam Masala Powder- 1/2 tbsp
  10. Oil- 2tbsp
  11. Salt- as required
  12. Water- 2 cups

To Grind:

  • Coconut (grated)- 1Cup
  • Fennel Seeds- 2 tbsp

Method:

  1. Clean and wash the chicken and keep this aside.
  2. Grind the coconut and fennel seeds to a fine paste.
  3. Heat oil in a pan add the onions and saute till they become translucent. Add the green chillies, ginger-garlic paste and chopped tomatoes. Mix well till everything blends together.
  4. Add salt, red chili powder, turmeric powder, coriander powder and garam masala powder, mix and add the chicken pieces.
  5. After stirring for about 5 minutes add water and coconut paste. Close it with a lid and let it cook for 10- 15 minutes on medium flame.
  6.  When the gravy is done, mix the steamed rice balls keep over low flame for 4- 5 minutes till it combined well. Serve hot and enjoy.


Monday, October 26, 2020

Crispy Baked Shakarpar


Shakarpar is a delicious Indian bite-sized cookies that's a Must during festive time. This is usually deep fried in oil but as I wanted a healthier version, I made them in whole wheat flour instead of all purpose flour and baked them till crisp.


This is one of my favorite snacks, which were so good to eat with evening tea. I see this always in Indian stores here but didn't want to buy because of the fried version, and so one day I couldn't resist and I thought of trying them and so I baked them and they turned out perfect.

These are crunchy from outside and tender inside. this is a very easy recipe which can be made in a very less time. These will be liked by all.


Ingredients:

  1. Whole Wheat Flour- 2 Cups
  2. Melted Butter- 2 tbsp
  3. Salt- a pinch
  4. Jaggery- 1/4 Cup (powdered)
  5. Milk- 1/2 Cup

Method:

  1. Add the butter, jaggery, and milk in a sauce and heat on a low flame. Stir occasionally till the jaggery melts. Let it cool. (If you want, you can first melt the jaggery and sieve it to remove the impurities).
  2. Add the whole wheat flour, salt in another mixing bowl, gradually add the warm milk mixture and mix well to form a dough. 
  3. Allow the dough to rest for 20 minutes. Divide the dough into 4 parts. Take one dough ball at a time and roll it using a rolling pin, cut into one inch squares using a knife or a pizza cutter. Place them on a baking tray separately without touching each other using a flat spatula.
  4. Meanwhile preheat the oven to 350 degrees F. Place the baking tray and bake for about 9- 12 minutes. They will continue to cook after baking because of the heat. Enjoy the crispy baked mouth watering treats.


Monday, June 22, 2020

Baked Qatayef!!!


Qatayef is a middle eastern dessert. These are yeasted pancakes stuffed with nuts or cheese filling then doused in a thick sugar syrup. They can be soft or crunchy, open or closed, sweet or savory a snack with lots and lots of options. The center can be filled not only with cheese or nuts but also with nutella. This qatayefs are ridiculously crunchy,  bursting with sticky, syrupy sweetness with every bite.


 I tasted these delicacies from a friend who is from Palestine. During Ramadan, she gave some of these uncooked qatayefs for iftar along with a bowl of sugar syrup and told me the method of either deep frying or baking then to dip them in sugar syrup and enjoy for iftar. I baked some and some I deep fried for the kids. They were so crispy and crunchy. We liked it a lot. My kids were finishing them quickly, It was so delicious. My friend told me that this is made during Ramadan times and this is one of the delicious desserts which will be loved by all and so it is.. Please try this out and let me know.


Ingredients:
For the Sugar Syrup:

  1. Sugar- 1 cups
  2. water 1 cup
  3. Lemon juice- 1 tbsp
Method:

  1. In a medium pan combine together the sugar, water and squeeze of lemon juice. Set it on high heat.
  2. Bring to a rolling boil and reduce the flame to medium. Let it simmer for 10 minutes. The syrup will thicken slightly.
  3. Switch off the flame and keep this aside to cool.

For the Pancakes:

  1. All Purpose Flour- 2 Cups
  2. Sugar- 1 tbsp
  3. Milk- 2 tbsp
  4. Baking soda- 1tsp
  5. Yeast- 1 tbsp
  6. Water- 3 Cups

Method:

  1. Mix all the ingredients for the pancake using a hand mixer till everything gets mixed well and forms a loose, pourable batter.
  2. Leave the batter for 10- 20 minutes to bubble up.
  3. Heat a non stick griddle, using a small ladle or an ice cream scoop drop about 2 tbsp of the batter over the skillet. the pancake should be about 3 inches in diameter.
  4. Allow to cook the pancakes slowly without flipping (you can see many bubbles forming) and when they are cooked keep it aside and continue with the remaining batter till all the batter gets over and keep the pancakes separate without sticking to each other and cover them with a damp towel while making the rest of the pancakes. Let them cool completely before filling.

For the Filling:

  1. Ricotta Cheese- 1 Cup
  2. Granulated Sugar- 2 tbsp
  3. Coarse ground Pistachios- 1/2 Cup

Method:

  • Mix all the ingredients for the filling in a bowl and keep it aside.

For assembling:

  1. Take the pancakes with the bubbly side up fill with the cheese and nut filling and close the pancake into half without tearing. Squeeze and pinch the outer edge tightly using your fingers to seal.
  2. You can either freeze them for about a month for later use or heat a skillet with oil and deep fry them to golden brown and crisp.
  3. Here I have deep fried half of them in oil and the other half I baked till done.
  4. Dip these hot fried/ baked qatayef into the prepared sugar syrup and enjoy a crispy crunchy snack.


Thursday, June 4, 2020

Baked Cauliflower Wings


These spicy baked cauliflower wings are a perfect tea time snacks which the whole family and friends will enjoy. You can adjust the spiciness according to your tastebuds by adding more or less honey. Though these doesn't taste like chicken wings but these vegan buffalo wings are pretty darn tasty in their own way. These buffalo wings would satisfy the cravings and also as they are baked, we don't feel guilty of eating them.


The recipe is super easy to make and only with few ingredients. For the crispy edges just keep them for broil until the sauce is sticky and caramelized. This will be a hit among both vegans and also meat eaters. Whenever you are craving for a serious comfort food, this is a perfect one to weigh down. I guarantee you that this will be gone within seconds. Please try this out and let me know.


Ingredients:

  1. Cauliflower Florets- 1 head (cut into florets)
  2. Garlic powder- 1 tbsp
  3. Flour- 1/2 tbsp
  4. Salt- as required
  5. Milk- 1/4 Cup
  6. Sauce:
  7. Hot Sauce- 1/4 Cup
  8. Honey- 1/4 cup
  9. Butter- 1 tbsp

Method:

  1. Mix the flour, garlic powder, salt and milk in a mixing bowl. add the cauliflower florets and coat each piece so that the batter covers the florets.
  2. Preheat the oven to 350 degrees F. Place a parchment paper on the baking tray and arrange the florets separately without touching each other. Bake this for about 15- 20 minutes.
  3. When they are getting baked, melt the butter, honey and hot sauce in a sauce pan. When the florets are done, mix the sauce on the baked florets and arrange them separately on the parchment paper and bake for another 10 minutes and you can take it out and enjoy with ranch or I like to broil for another 5 minutes.


Thursday, January 2, 2020

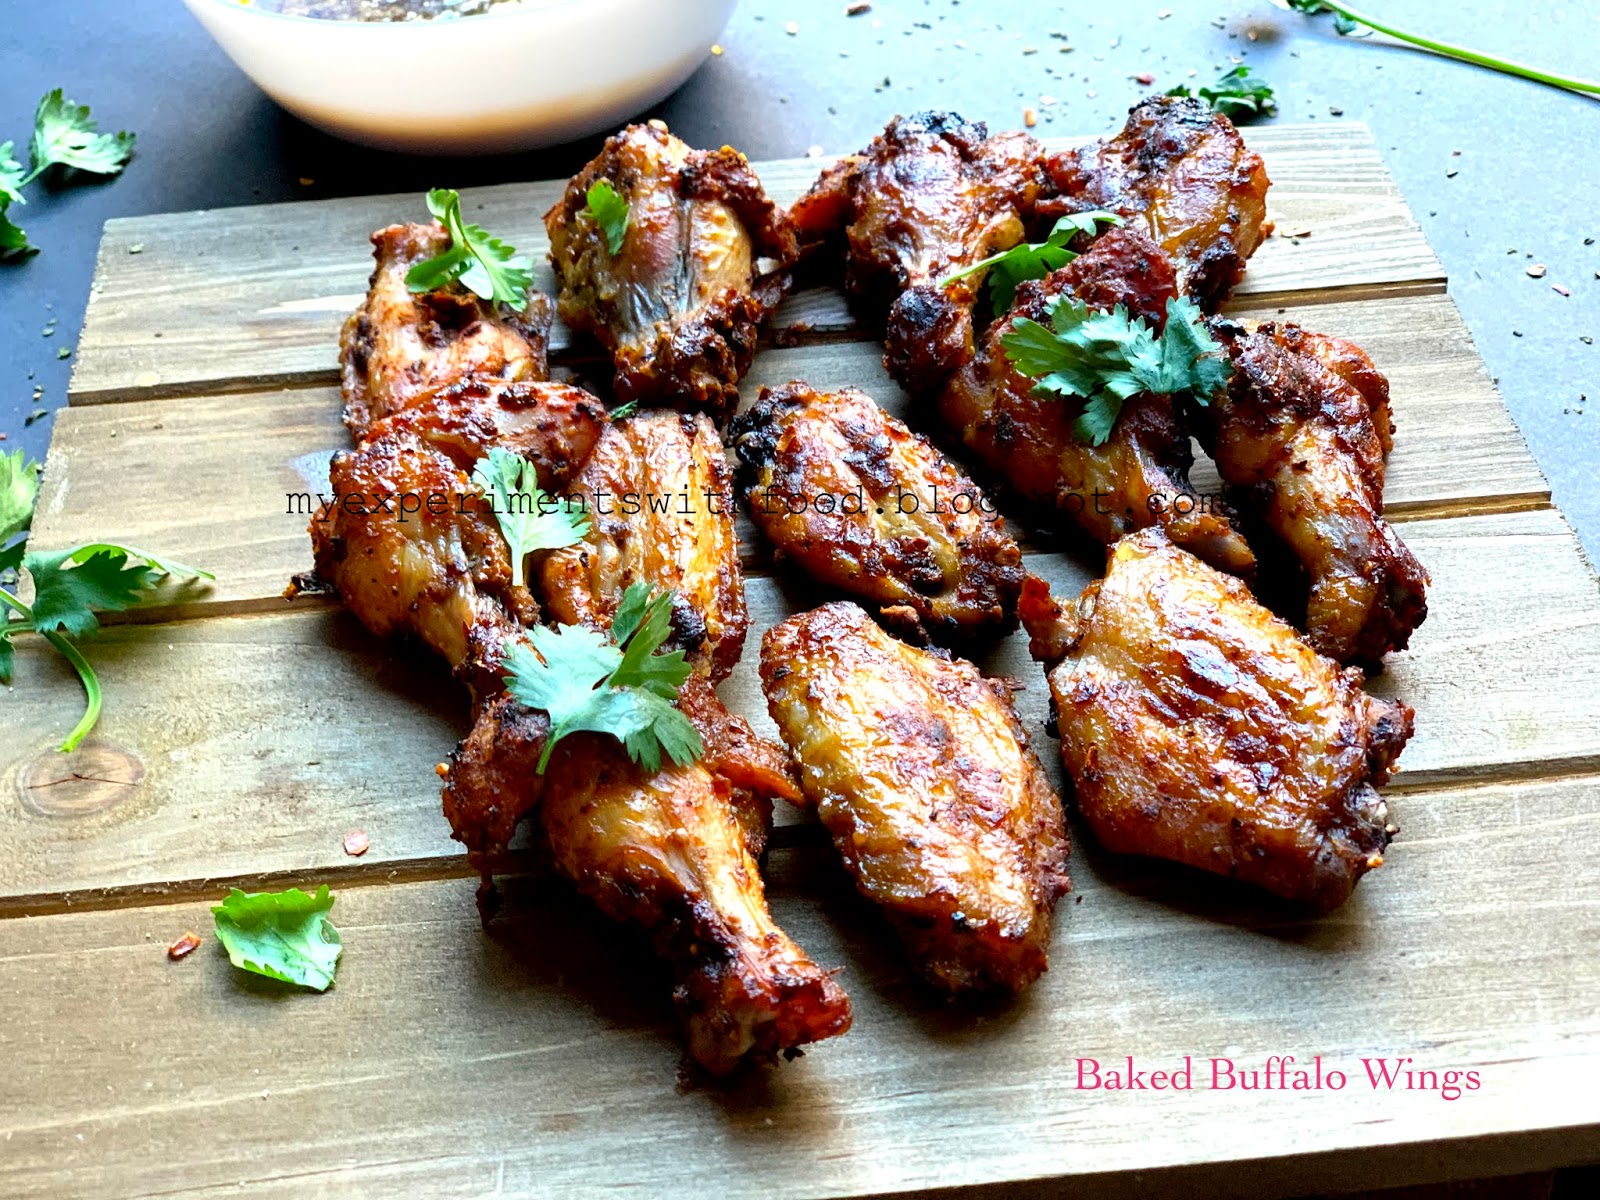
Baked Buffalo Wings and Hot sauce- Twice the celebration, double the joy!!!

                                                      Happy New Year my friends!!!!!!


There are two things to celebrate in my post today. First it's a new year, new beginnings and the second one which I am more excited is that last year it was my blog's 9th anniversary.  Never in my wildest dreams I thought that this space which I have started to share my recipes with family and friends would become a space where I got many friends, a space to share all my dreams and a space to experiment new recipes.


 Once I started blogging, I never thought i'd still be doing it 9 years later. I never thought that through this space I will be able to reach and connect with so many of you and to have the chance to share my ideas with the world. THANK YOU for being here no matter how long or short you have been following.


These buffalo chicken wings are every meat lovers favorite. This finger licking popular creation came out of New York restaurant in the 60's Teressa Bellissimo, who covered the chicken wings in her own special sauce. From then on this has become a popular snack or an appetizer.


Chicken wings are one of our family favorites. These juicy chicken wings tossed in a classic spicy sauce and are enjoyed along with the hot sauce. Snack away with less guilt. The marinade for the chicken is a combination of garlicky, sweet and spicy which will make you reach for more. Even though these are baked they are crispy and delicious just like the ones from the restaurant.


Ingredients:

  1. Chicken Wings- 12- 15 pieces
  2. Garlic Powder- 2 tsp
  3. Salt- as required
  4. Honey- 2 tbsp
  5. Baking Powder- 1 tsp
  6. Hot Sauce- 2 tbsp
  7. Black pepper Powder- 1 tsp
  8. Red Chili powder- 1 tbsp

Method:

  1. Preheat the oven to 350 degrees F.
  2. Meanwhile pour all the ingredients (except chicken pieces)in a bowl and mix well until everything gets well blended.
  3. Mix the chicken pieces in the above mixture and arrange them on a baking tray. Bake the coated chicken pieces for about 25- 30 minutes.
  4. Serve the chicken wings along with the hot sauce.

Hot sauce recipe:

  1. Hot sauce- 1/4 Cup
  2. Soy sauce- 1 tbsp
  3. Garlic Powder- 2 tbsp
  4. Honey- 1 tbsp
  5. Oil- 1 tbsp
  6. Butter- 1 tbsp

Method:

  • Combine all the ingredients in a sauce pan and let it simmer for about 8- 10 minutes. 
  • Switch it off and cool and enjoy along with the buffalo wings.


Thursday, May 30, 2019

Simple and Easy Chicken Tacos


The Ramadan fasting is going to end, but the list of snacks which I want to try is never going to end. One among them are Tacos. This is a very simple chicken taco recipe which is perfect for a get together, or on a game night. This is very filling and a delicious meal, which will be enjoyed by all.
I am really amazed and surprised that I made the chicken tacos at home, which I never thought I would do. These chicken tacos are so easy to make and are so simple that it would take less than 30 minutes. I bought the ready made tacos but we can also make them from scratch, that I will try some other time. The chicken filling and the salsa in the tacos will be an ultimate combination. We can top it with different variety of sauces, we can also top it with guacamole and load it with chopped lettuce, sour cream and cheese. We can customize the tacos according to our taste and desire.


Traditional street tacos are served on corn tortillas, topped with onions, tomatoes, cilantro and a squeeze of lemon. Now there are many different fillings and toppings, which will keep you coming back for more. Last but not the least, enjoy your tacos with a squeeze of lime. Hope you all will like this and try this out. Please let me know how this turned.


Ingredients:

  • Whole Wheat Tacos- 10 nos

Chicken Filling:

  1. Minced Chicken- 1 Cup
  2. Capsicum (chopped)- 1 no
  3. Onions(chopped)- 1 no
  4. Cumin Powder- 1 tsp
  5. Chili Powder- 1 tsp
  6. Pepper Powder- 1 tsp
  7. Salt- as required
  8. Oil- 1 tbsp

Salsa  Filling:

  1. Tomatoes(chopped)- 1 no
  2. Onion(chopped)- 1 no
  3. Green Chilies(chopped)- 2 nos
  4. Salt-- as required
  5. Lemon Juice- 1 tbsp

Method:

  1. Heat oil in a pan, add the chopped onions, capsicum. Saute well by adding little salt.
  2. Add the minced chicken and mix well till everything gets combined well. Add the spice powders and adjust salt accordingly. 
  3. Once the chicken gets cooked and all the water evaporates, switch off the flame and keep this aside.
  4. In a bowl, add all the chopped tomatoes, onions, salt and lemon juice, mix and keep this aside.
  5. Assembling:
  6. Take a taco, fill with the chicken filling and top it with the salsa. Repeat with the remaining tacos and the filling and serve it.


Saturday, May 18, 2019

Boiled Egg Chaat


Boiled Egg Chaat is an appetizer which I learned during the Ramadhan fasting time. Before that, I never knew that we can make a Chaat using boiled eggs. This is super delicious, tasty and a very easy dish to make during a get together that will be liked by all. One day for Iftar, I made this and instantly everyone in my house liked this simple dish.

Sliced eggs after shallow frying
Eggs are a great comfort food and easy to cook too.This simple dish is a great source of protein as well as makes a great snack as well. This dish doesn't require any preparation, if you have unexpected guests, this is a perfect appetizer to serve.


I was going through instagram and accidentally saw this egg chaat in Jinoos Kitchen, which looked amazing and a delicious dish to try out. In this dish, the boiled eggs are sliced and shallow fried along with spices, in a tbsp of oil. The shallow fried eggs are arranged in a plate and topped with onions, tomatoes, coriander leaves, chaat masala, chili powder, amchur powder, a dash of salt and ending it with a sprinkle of lemon juice. Within minutes a lip-smacking snack will be ready to be served and enjoyed.


Ingredients:

  1. Boiled Eggs- 3 nos
  2. Oil- 1 Tsp
  3. Chili Powder- 1 Tsp
  4. Turmeric Powder- 1 Tsp
  5. Salt- a pinch

To assemble:

  1. Onions (chopped) - 1/2 no
  2. Tomatoes (chopped) - 1 no
  3. Coriander Leaves (chopped) - 2 tbsp
  4. Chaat powder- 1 Tsp
  5. Aamchur powder- 1 tsp (optional)
  6. Chili and Turmeric Powder- a pinch
  7. Lemon juice- 1 tbsp

Method:

  1. Slice the boiled eggs and place them evenly on an oiled pan. Let this shallow fry on a low flame, add the chili powder, turmeric powder and sprinkle some salt on top and flip on both the sides.
  2. Once it is lightly fried, arrange them on a plate to be served.
  3. Spread the chopped onions evenly on top of the fried egg slices. Add a layer of chopped tomatoes.
  4. Sprinkle the chili powder, turmeric powder, Chaat powder, amchur powder, a dash of salt and end with chopped coriander leaves. Sprinkle on top with lemon juice and enjoy a delicious egg chaat.


Related Posts Plugin for WordPress, Blogger...